I see buyers misuse scoop stretchers for long transport. That causes extra motion and extra risk. I use a simple plan to control risk and move the patient fast.
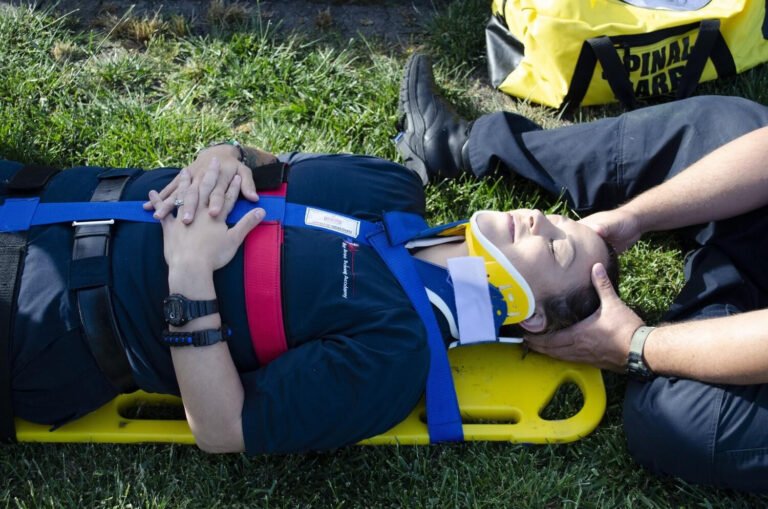
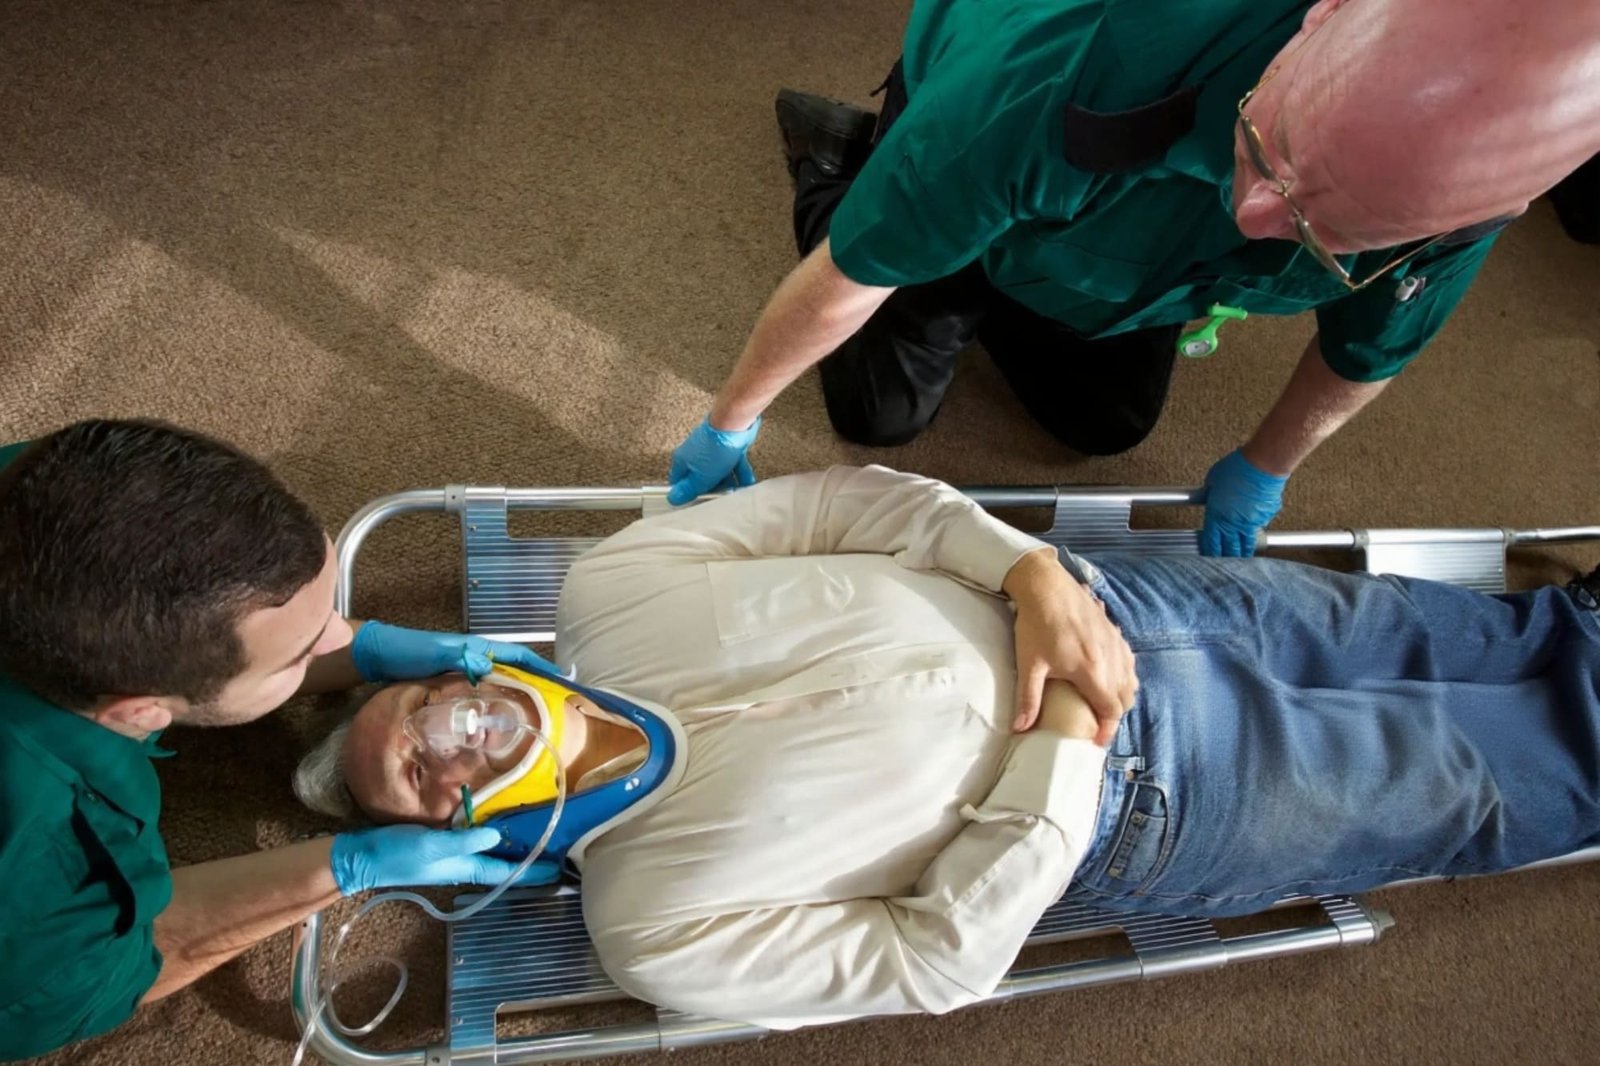
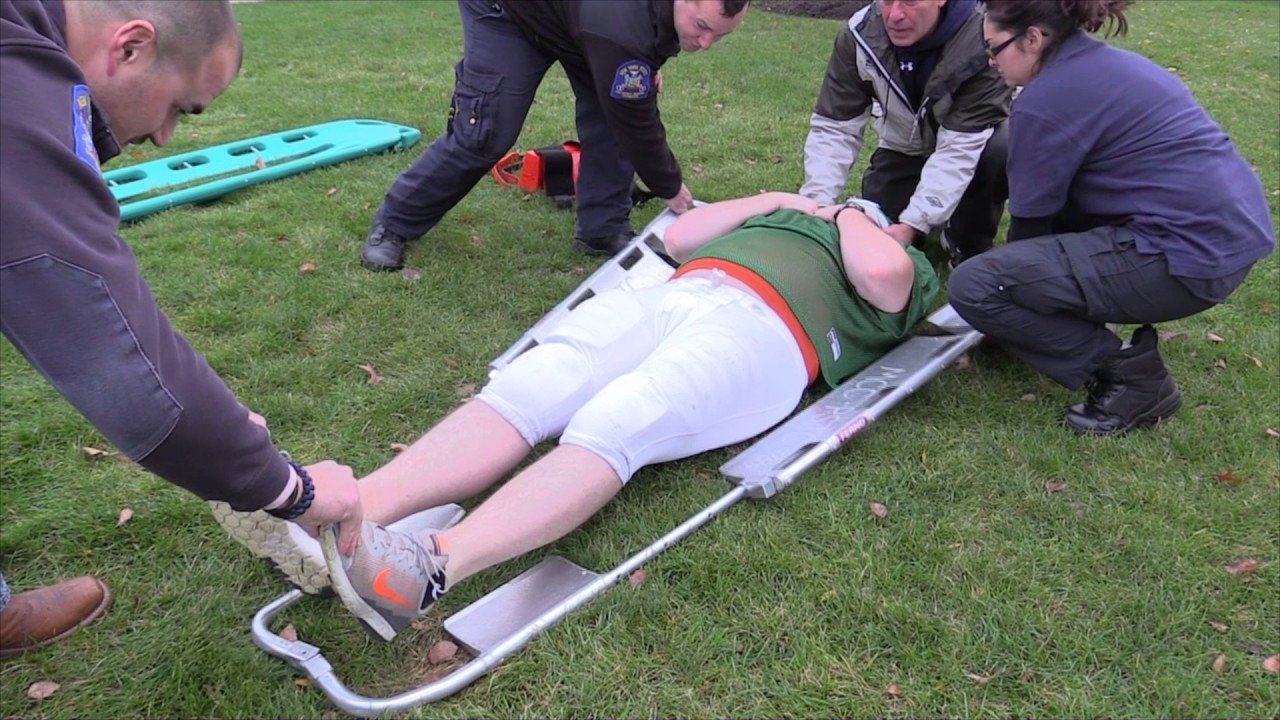
A scoop stretcher is for short transfer with minimal movement. Use four lifters and one commander.1 Apply a cervical collar and head immobilizer per local protocol.2 Run pre-lift checks. Move on the count. Hand off to the ambulance stretcher. Do not use it for long transport.
I learned this through repeated pre-sales questions and field training script work. Many teams skip head support or carry too far on the scoop. I repeat the boundaries before and after every drill. I then drill the commands and checklist until the team moves as one.
What is the true role of a scoop stretcher?
Many teams think a scoop stretcher is a spine board replacement. It is not. I have seen long carries with the scoop. I saw extra motion and extra pain. That must stop.
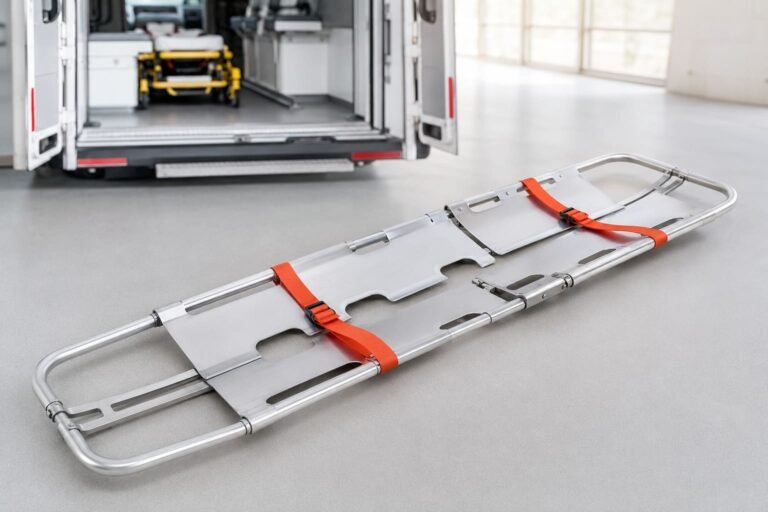
A scoop stretcher reduces motion during short transfer.3 It splits, slides in halves around the patient, and assembles under the back and pelvis.4 It is a bridge tool. Move from ground to ambulance stretcher fast, with immobilization, then hand off.
Short transfer, not long transport
- The scoop is for minimal movement during pick-up and short moves.
- It is not a long-transport device. It does not replace a spine board.
- Use it to go from ground or floor to the main stretcher or transfer bed.
Use cases and boundaries table
| Use Case | Allowed? | Notes |
|---|---|---|
| Ground-to-ambulance stretcher | Yes | Short distance only. Minimal motion. Apply collar and head support. |
| Room-to-elevator short transfer | Yes | Keep path smooth. Commander controls all moves. |
| Long carry across campus | No | High motion risk. Use definitive stretcher or board per local protocol. |
| Stair descent with scoop only | No | High fall risk. Use a stair chair or per local protocol. |
| Prolonged immobilization on scoop | No | Hand off early. Verify straps and head immobilizer on receiving device. |
My field notes
I wrote training scripts after seeing misuse in tenders and demos. I saw scoops used without collars and without head blocks. I saw poor handoffs. This plan fixes the common errors. It keeps the focus on short transfer and fast handoff.
How should my team set up and check before the lift?
Teams jump to lift without checks. I saw straps loose, locks open, and wrong length. Small errors make big motion. I slow the team down with a short checklist.
Use four lifters and one commander. Apply the cervical collar and head immobilizer per local protocol. Run the four-step pre-lift check: Length, Locks, Straps, Commands. Only move after all items pass.

The four-step pre-lift check
- Length: Adjust to match patient height and planned handoff surface.
- Locks: Confirm both end locks work and engage.
- Straps: Set straps open and routed, ready to secure after assembly.
- Commands: Agree on words and counts; one commander speaks.
Roles and positions table
| Role | Position | Task |
|---|---|---|
| Commander | At head, near airway control | Runs checklist, gives commands, watches for motion and risk. |
| Lifter Left | At left torso/pelvis | Controls torso and pelvis, follows count, keeps alignment. |
| Lifter Right | At right torso/pelvis | Mirrors left, watches locks and straps during assembly. |
| Lifter Feet | At legs/feet | Controls lower limbs, keeps knees from twisting. |
| Lifter Spare | Assists with head block and straps | Helps place halves and secure straps fast on command. |
Collar and head support
- Apply a cervical collar per local protocol before the lift.
- Place a head immobilizer or foam blocks per local protocol.
- Re-check after assembly and before any move.
My script line
I ask the commander to say: “Team, four-step check now. Length, locks, straps, commands. Collar and head support are on per protocol. Confirm ready.”
What commands keep movement safe and coordinated?
Teams talk over each other.5 I saw hands move early and hips twist. That makes extra motion. One voice fixes this. The words stay short and clear. The count gives rhythm.
Use one commander. Use short words. Move only on the count. Example: ‘On my count. Ready. One, two, three—roll.’ ‘One, two, three—assemble.’ ‘One, two, three—lift.’ ‘One, two, three—move.’ Stop if anyone calls stop.

Command script overview
| Step | Command Phrase | Purpose |
|---|---|---|
| Pre-check | “Team ready. Length, locks, straps.” | Confirms checklist. |
| Collar/Head | “Collar on. Head support ready.” | Confirms immobilization per protocol. |
| Roll | “On my count. One, two, three—roll.” | Small roll to insert halves. |
| Assemble | “One, two, three—assemble.” | Engage locks and align halves. |
| Strap secure | “Straps secure: chest, pelvis, legs.” | Tighten in order, no excess pressure. |
| Lift | “On three—lift.” | Lift as a unit, straight up. |
| Move | “On three—move.” | Short, smooth steps, no twist. |
| Stop | “Stop.” | Any person may call stop immediately. |
Extra points I stress
- No one moves early. The count ends with the action word.
- The commander watches the head, spine line, and pelvis.
- The team calls “stop” loud if pain or misalignment appears.
- Replace any non-standard talk with the script words.
My field note
When I fix the words, movement improves. The team is calmer. The steps are clean. I see fewer hands drift and fewer hips rotate. The patient is steadier.
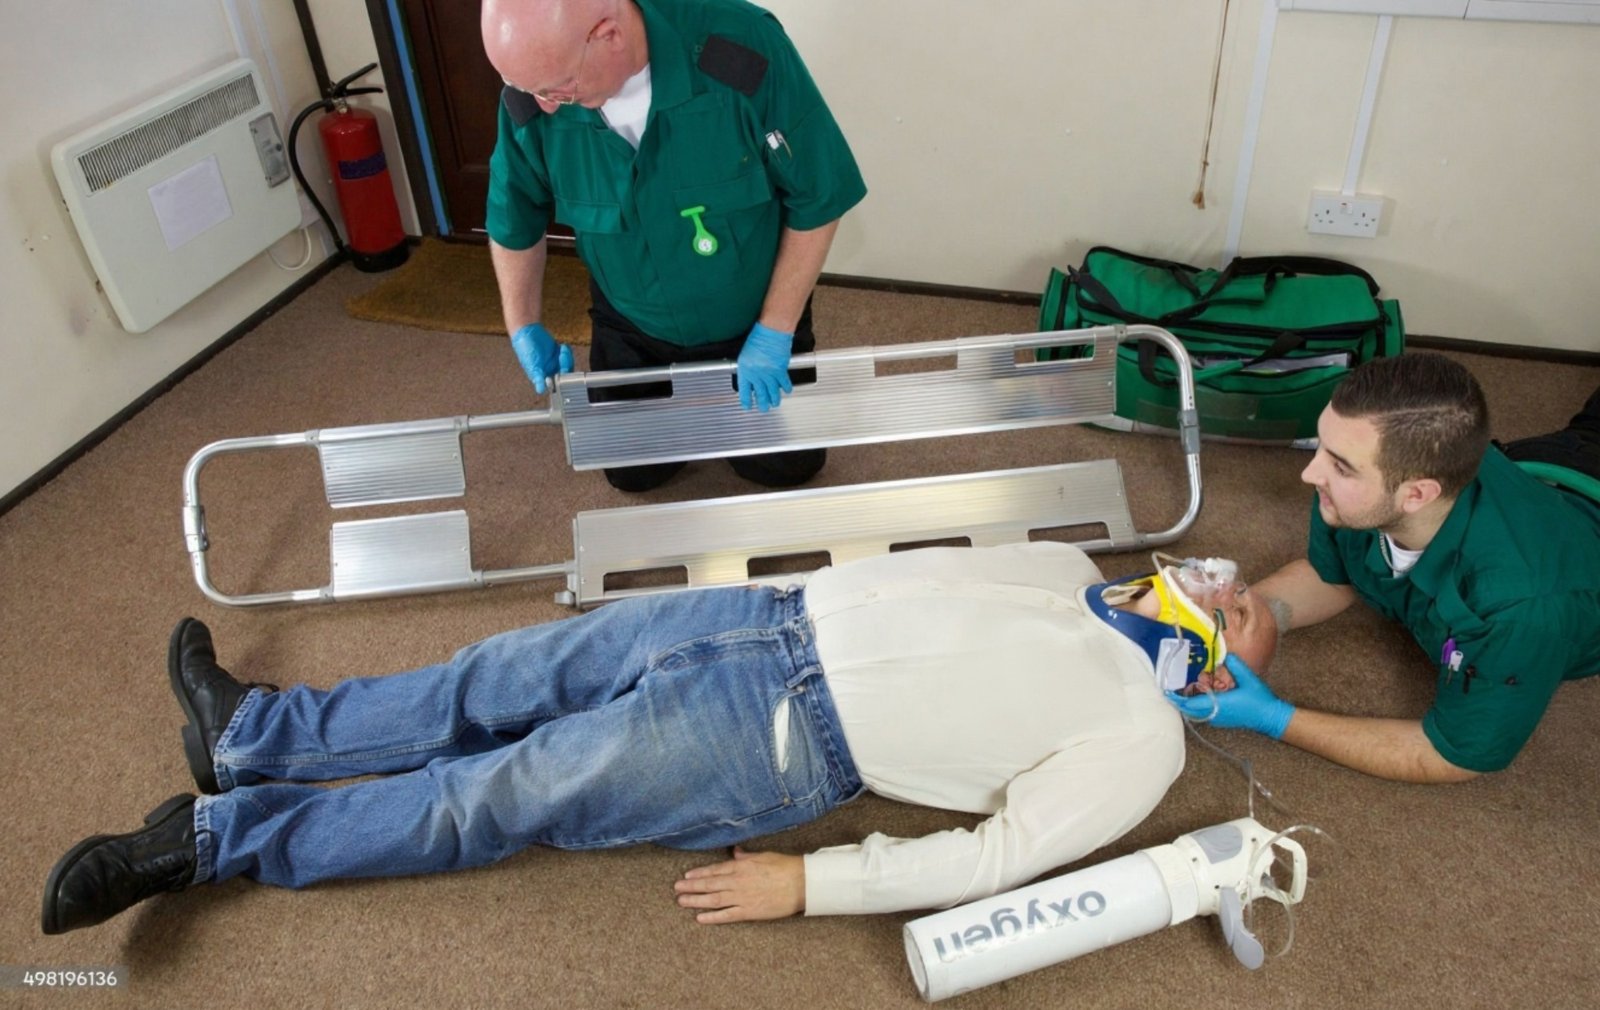
How do we split, place, and assemble around the patient?
I saw teams try to slide the scoop under the patient in one piece. That creates more motion. The split design is the point. Use it. Place halves around the body. Then lock.
Roll just enough to slide each half, never more.6 Align under the spine and pelvis. On command, lock the ends. Secure straps in order.7 Re-check collar and head immobilizer per local protocol before any move.
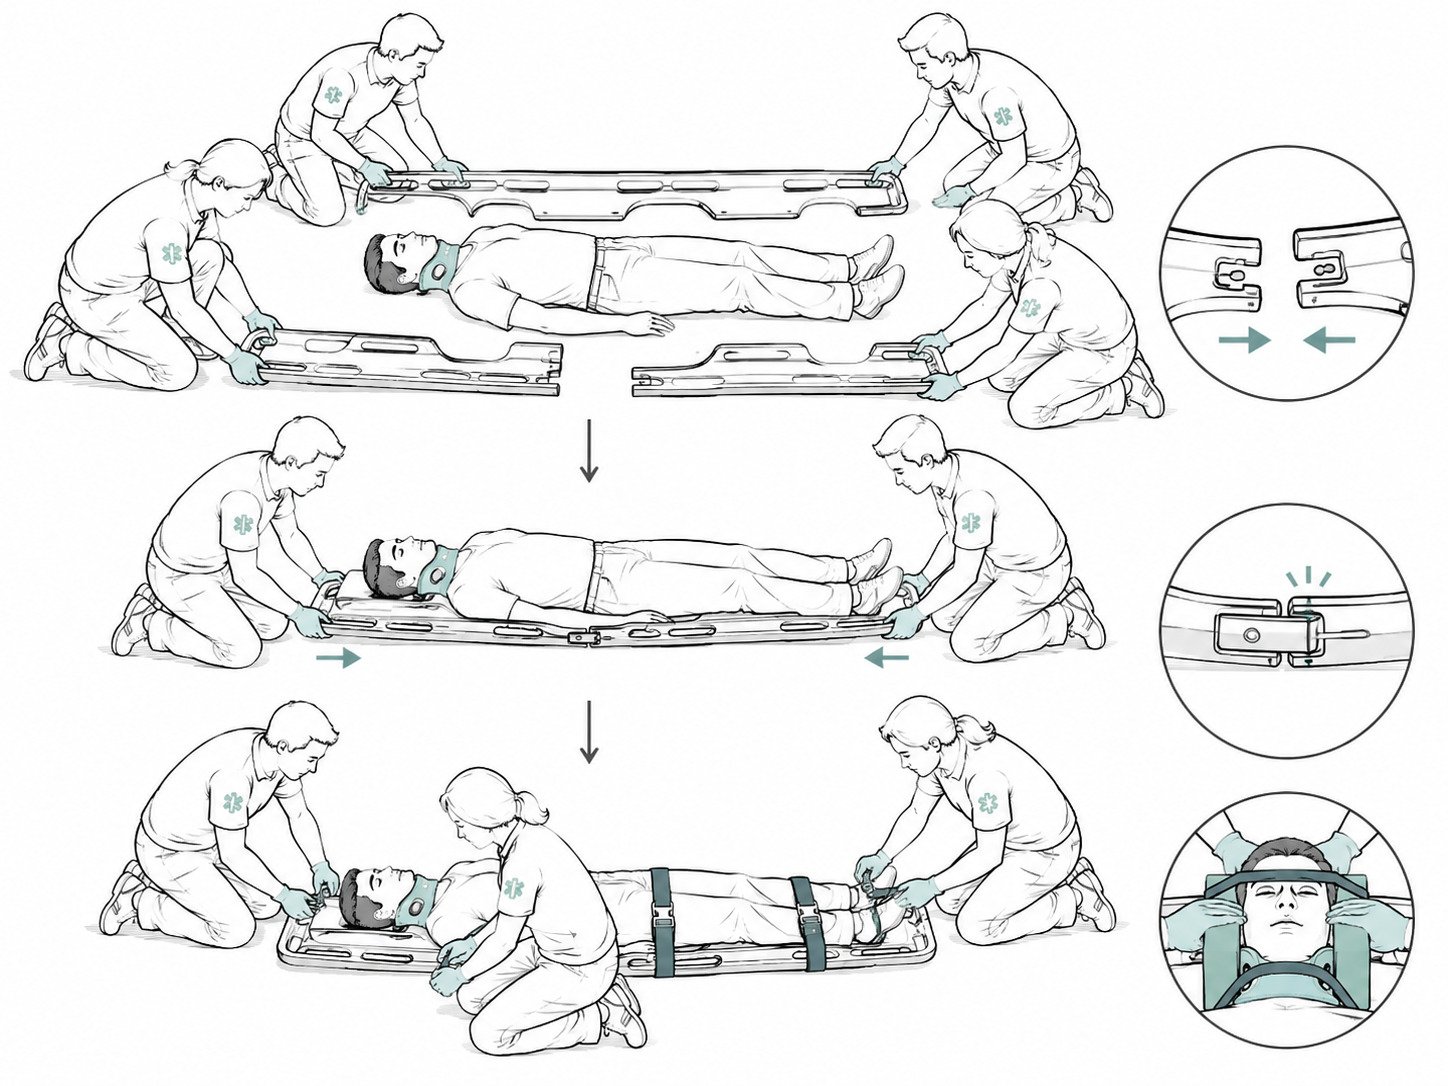
Step-by-step placement
- Place left half on the left side, parallel to the body.
- Place right half on the right side.
- Roll the patient a small amount on the count, then slide the left half under.
- Roll back to neutral, then on the count slide the right half under.
- Align ends with locks. On the count, engage locks.
Strap order table
| Strap Position | Order | Notes |
|---|---|---|
| Chest | 1 | Secure first to control upper body motion. |
| Pelvis | 2 | Key control point; avoid compressing injury. |
| Legs | 3 | Close gaps; keep knees aligned. |
High-risk flags
- Pelvic or hip injury suspected: pause, reassess. Minimize movement. Follow local protocol for stabilization. Consider alternate methods if allowed.
- Pain spike or new motion: stop. Realign. Re-check locks and straps.
Collar and head support
- After assembly, re-check collar fit.
- Place head blocks and straps per local protocol.
- Confirm airway access and comfort.
My field note
When we split and place, the motion stays small. The pelvis stays steadier. The locks engage cleanly. Strap order matters. The chest and pelvis control most motion.
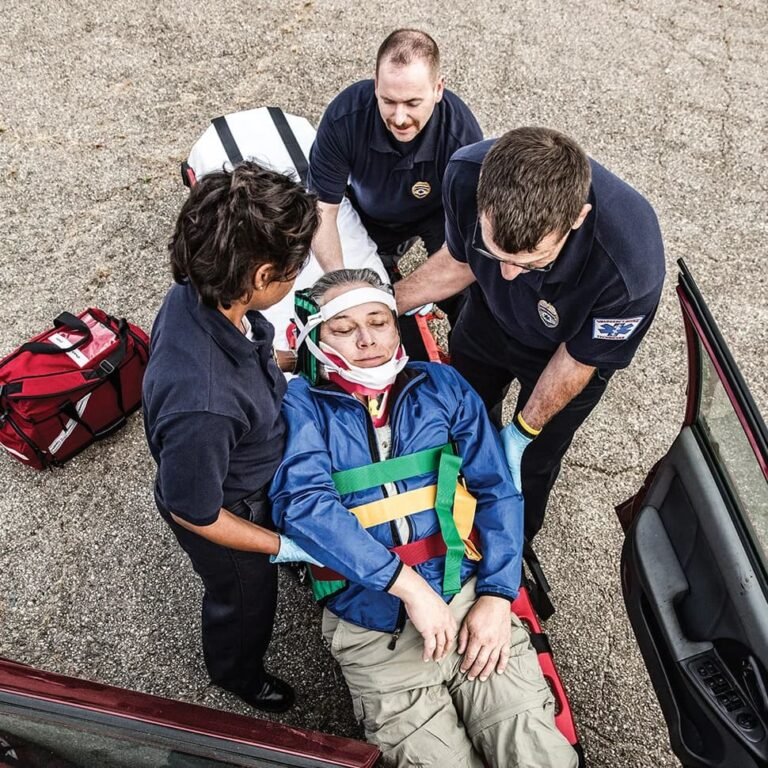
How do we hand off from scoop to the ambulance stretcher?
Handoffs go wrong when the receiving stretcher is not ready. Teams forget to set its straps. Head support is lost during the slide. I slow this step down with a short check.
Prepare the ambulance stretcher or transfer bed first.8 Set straps open. On command, lift and move. Transfer on the count. Re-secure straps and head support. Then, per local protocol, release scoop locks and remove the scoop.
Handoff checklist
- Receiving platform ready: height, brakes on, straps open.
- Team alignment: same roles, same commander.
- Path clear: no steps, bumps, or loose gear.
Handoff sequence table
| Action | Command Phrase | Check Point |
|---|---|---|
| Approach | “On three—move to stretcher.” | Keep lines straight and steps short. |
| Position and align | “Centerline aligned.” | Align scoop centerline to stretcher. |
| Transfer | “On three—transfer.” | Smooth slide or lift-over per protocol. |
| Secure on stretcher | “Straps secure: chest, pelvis, legs.” | Re-check head immobilizer per protocol. |
| Release scoop | “Release locks.” | Only if protocol allows; remove scoop cleanly. |
Important note
- The scoop is not the final transport. The ambulance stretcher is the final carrier for long move.
- Release locks only when straps and head support on the ambulance stretcher are secure.
- Keep the patient still during the release.
My field note
I have seen head blocks drift during handoff. I now keep a hand at the head on the count. The commander watches this point. The handoff is smoother and safer.
What if we only have three people?
I sometimes hear “we only have three.” I do not prefer this. Control drops with fewer hands. Risk goes up. I allow it only when there is no fourth person.
Use three-person lifts only in emergencies.9 Keep distances short. Avoid stairs and uneven ground.10 Add extra strap control. Pause more. Follow local protocol for any changes.
Three-person roles table
| Role | Position | Task |
|---|---|---|
| Commander | At head | Commands, watches alignment and head support. |
| Lifter Left | At torso/pelvis | Controls torso and pelvis. |
| Lifter Right | At legs | Controls lower limbs and helps with straps. |
Limits and risks
- Less control at pelvis and legs. Motion risk increases.
- No use on stairs. No long distances. No uneven ground.
- Do not rush. Use more pauses. Check alignment after each step.
- Consider adding a slide sheet per local protocol to reduce friction.11
Emergency script change
- “We have three. Limits in place. Short distance only.”
- “On three—roll. On three—assemble. On three—lift. On three—move.”
- “Stop if anyone calls stop.”
My field note
I tell buyers this is a fallback only. I remind them to train for four-plus-one. I repeat the boundaries. The scoop should not become the long-transport device just because staff is short.12
Conclusion
Use the scoop for short transfer, minimal movement, and fast handoff. Train four-plus-one, use the checklist and commands, and follow local protocol for immobilization.
This source outlines best practices for team roles during patient transfer using scoop stretchers. ↩
This source discusses the importance of cervical collars and head immobilizers in patient stabilization during transfers. ↩
This source explains the design and intended use of scoop stretchers for minimizing patient movement during short transfers. ↩
This source describes the mechanism of scoop stretchers, including their ability to split and reassemble around a patient. ↩
This source highlights communication challenges in emergency medical teams and the importance of clear commands. ↩
This source explains the minimal rolling technique required for placing scoop stretcher halves under a patient. ↩
This source outlines the importance of securing straps in a specific order to minimize patient motion during transfer. ↩
This source emphasizes the importance of preparing the receiving stretcher or bed before transferring a patient. ↩
This source discusses the risks and limitations of three-person lifts in emergency scenarios. ↩
This source explains the risks of using scoop stretchers on stairs and uneven ground. ↩
This source discusses the use of slide sheets to reduce friction during patient transfers. ↩
This source explains why scoop stretchers are not suitable for long transport and emphasizes their intended use for short transfers. ↩